Never Shuck Corn Again!
Never shuck corn again!
THIS CHANGES EVERYTHING.
More Posts from Rgfellows and Others
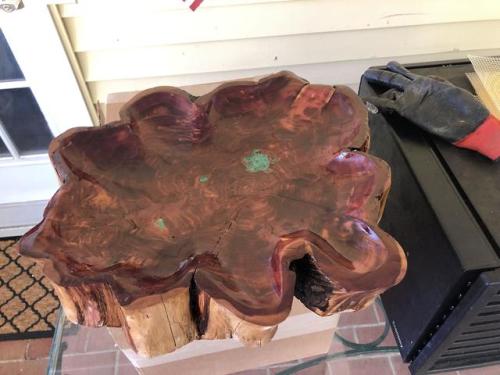
via /r/woodworking

Grass seeds + Soil + a CD case = An epic container garden.

DIY Nightmare Before Christmas Wrapping Paper
I’ve posted a lot of Halloween DIYs from DIY NBC Props - especially Nightmare Before Christmas tutorials.
Find the Nightmare Before Christmas Wrapping Paper as seen at DIY NBC Props here.
You can download the Nightmare Before Christmas Wrapping Papers from Tim Baker’s DeviantArt page here.
As always, if you see a printable that you like, download it ASAP. It may be deleted at any time.

Closeups of the paper:


The ribbons:

Kristie also made a black and white version of this paper:


Artist Jan Vormann uses Lego bricks to repair and fill holes in broken walls.
Hello! Your embroidery is beautiful! Do you perhaps have tips or could recommend webpages/videos on how to embroider? I'm especially interested in how to do these mushrooms/flowers, which kind of stitches (?)/styles produce these artworks? Thank you for posting your gorgeous results!
Hello, and thank you!
I learned embroidery mostly from books, and have somehow watched hardly any embroidery videos. But I know there are lots and lots of websites and videos out there.
The main book I refer to now for embroidery is 18th Century Embroidery Techniques by Gail Marsh, but the Reader’s Digest Complete Guide to Needlework is my go-to book for anything that’s not in the 18th century one.The Readers Digest one is VERY thick and has a huge range of stuff from quilting to bobbin lace, and an excessively large number of embroidery stitches. It’s a very common book and if your local library doesn’t have it you can get a secondhand copy for pretty cheap. (Here’s one on etsy for $7.) And it’s just one of many similar needlework guidebooks, so it ought to be pretty easy to obtain one. The 18th century one still has a lot of stuff that typical needlework guides don’t though, like metal embroidery.
But you asked specifically about the mushrooms and flowers I’ve posted, and I’m happy to report that those require only a few basic stitches! Needlework guides are full of dozens of different stitches and variations, but most projects only require a small number of them.
Here’s a breakdown of what I’ve been using, with links to tutorials for each stitch.
Satin Stitch - This is one of the most common, especially for flowers and leaves and other such solid shapes. I prefer to use one strand for this, so I don’t have to un-twist anything.

You can also do Padded Satin Stitch, which is the same except you work it on top of one or more layers of satin stitch, or some other filling stitch. This makes it more 3 dimensional. For my waistcoat I’m not padding it though, I want my shapes to be nice and flat like a picture.
Long and short stitch - Very similar to satin stitch, but with longer and shorter bits so you can fill a larger area, or blend different colours together. This shows up a lot on shaded flowers and leaves. I used it to do a little bit of shading on my tree stump, and to fill in the wider part of my green mossy ground, because you don’t want to make your satin stitches excessively long.

This little sample I did a few years ago illustrates it more clearly.

Stem Stitch - Also fairly similar to satin stitch, but done thin and very slanted. It’s pretty easy to vary the thickness, like I’m doing for my maple twigs.

French Knots - These take a little practice because you need to get the tension right, but they’re not difficult. I’m using them for the dots on my mushrooms. The mushrooms themselves and their little patches of substrate are done in satin stitch, and the French knots added on top afterwards.

For the ferns I’m using stem stitch for the stalk, and to do the leaves I just do little straight lines coming off them. These are easy, you just bring the needle up at the tip of the leaf and back down again at the end that’s attached to the stalk, or the other way around, whichever. This probably has a name but I don’t know what it is.
(However, you can get a similar fern effect with Fly Stitch. Or, if you want your leaf placement to alternate, with Feather Stitch.)

The brown fanned out triangles on the border are done like my fern leaves too. Just in on one side and out on the other to make little straight stitches. The clusters of 3 green dots are French knots, and the solid green and brown lines on either side are satin stitch.

Split Stitch - That Beardsley inspired waistcoat I made all those years ago was almost entirely done in split stitch, with the exception of a few French knots here and there. Chain Stitch produces a very similar effect though.

Backstitch - This is a stitch I mostly use for garment construction, and it produces nice strong seams, but it’s also good for embroidering thin and fairly smooth outlines. It’s what I used for most of the embroidery on my monster waistcoat.

There are a lot more embroidery stitches, but that’s most of what I’ve been using!
Taken individually the stitches themselves are fairly easy, and when you use them all together in different shapes and colours you get something that can look much more complicated than it really is. I hope this is sufficient to get you started on whatever it is you’re looking to embroider.
Remember to always do samples before starting a Big Project!
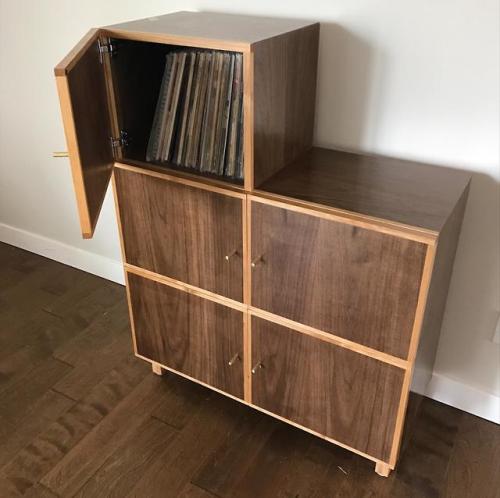
via /r/woodworking


Pallet bed by instagram.com/jellinadetmar

DIY Maple Caramel Sauce from thebibliosphere on Tumblr
Source: thebibliosphere
Time to make some maple caramel sauce to give to the fam for the holidays. Hopefully this pot is big enough to accommodate the lava bomf about to occur because I can’t be fucked washing two pots.

We’re less than ten minutes in and it’s already doubled. I think I may have made a mistake.


Panic, a visual study in three parts.

For reference, this is a 6 quart pot filled with molten sugar. And now I need to add butter to it. Fucking pray for me.
I lived, bitch!

By the magic of time lapses and a lot of flailing, we have salted maple caramel sauce. I did not attempt to record the chaos that occurred when I added the butter, but let’s just say I absolutely 100% needed a bigger pot for the portion size I made. I did not however melt the pot to the stove. This time.
Anyway, assuming you want to do this safely, here’s how you make a sane sized batch of maple caramel sauce.
Ingredients:
2 cups maple syrup (needs to be the real kind, will not work if it has corn syrup in it)
4 table spoons of butter
½ cup milk (if you want it to be really luxurious, use ½ cup heavy cream. I just used milk because that’s what I had and fuck going to the grocery store)
pinch of salt
Things you will need:
A medium to large sized saucepan with a heavy bottom. Pots with a lot of height are preferable, as this mother fucker likes to climb.
A wooden spoon or silicone, heat resistant spatula. Do not use plastic or nylon, they may will melt.
A candy thermometer.
Something to store it in.
Better self preservation skills than I have.
Method:
Imagine you are a maple tree
Take your maple syrup and put it over a medium heat. Do not start out on a high heat or you’ll burn the sucker. Gradually bring it to a boil until it is between the temperature of 225F - 230F.
Unlike my maple candy recipe, you do not want to go above 230F, because it will start to harden and you don’t want that. You also don’t want to stir as much, cause stirring causes crystallization and we want this sauce to be smooth.
Once it’s reached the desired temp, remove it from the heat and carefully add your butter. It may fizzle and seize, but that’s okay, just keep stirring until it’s melted in.
Add your milk/cream and stir in until blended.
Add a pinch of salt. Stir.
Pour into a heat proof jar, preferably using a ladle because handling hot sugar is dangerous (omg please be careful, don’t hurt yourselves), and allow to cool before refrigerating.
Don’t worry if it looks really thin, it’ll thicken up as it cools. Like so:

If it doesn’t thicken up, you needed to heat it longer. If it’s grainy, you over stirred it. If it’s melted to your stove you over heated it and possibly needed a bigger pan. Practice makes it easier, but generally speaking I find newbies to caramel actually find this easier than sugar cane caramel, largely because there’s no eyeballing involved.
If stored properly in the refrigerator this should last two weeks. Like most home made caramel sauces. If you freeze it in a freezer safe jar, it should last up to 2-3 months.
Enjoy.
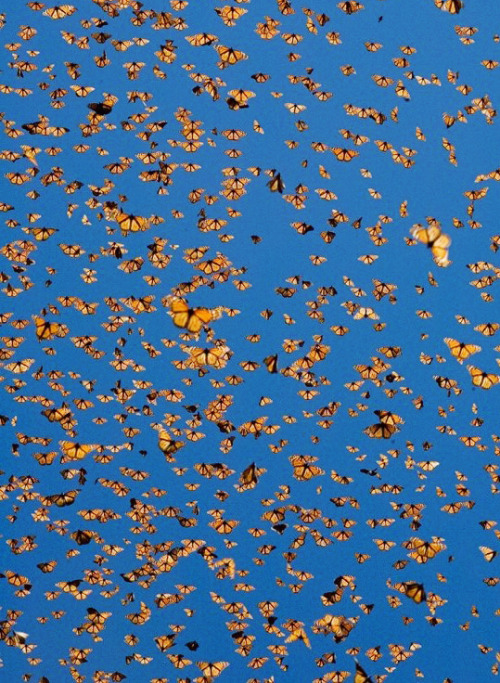
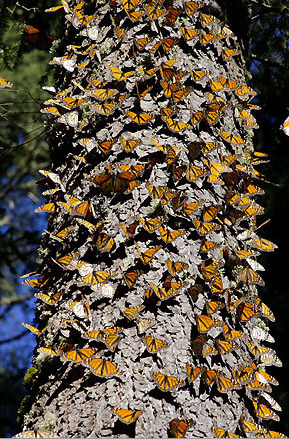
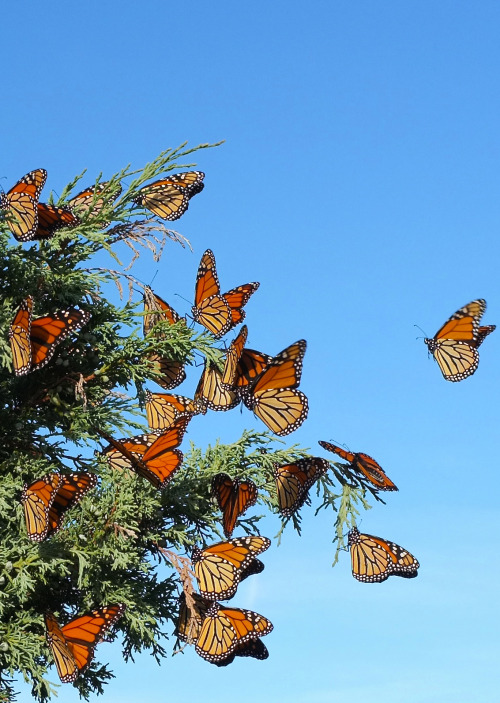

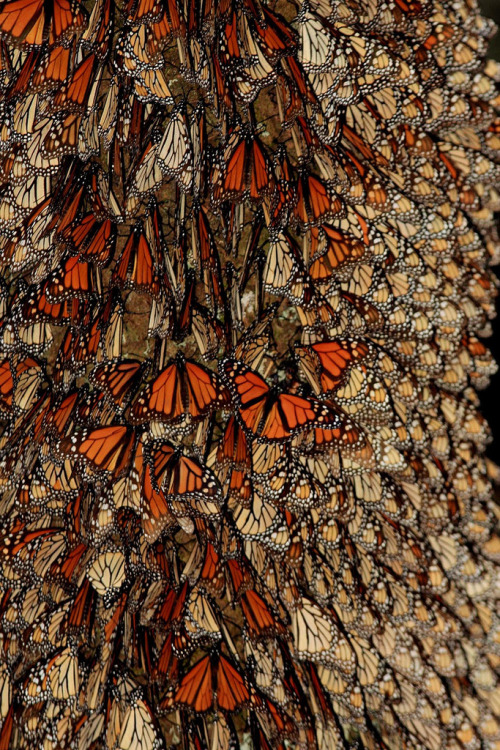

Each fall, millions of monarch butterflies migrate to California and Mexico for winter. North American monarchs are the only butterflies that make such a massive journey (up to 4,830 kilometers/3,000 miles). They use the sun to ensure that they stay on course and on cloudy days Earth’s magnetic field as a kind of backup navigational system. (read more here)
-
 catacatacatcat liked this · 2 years ago
 -
 rgfellows reblogged this · 4 years ago
 -
 unapologetically-yellow reblogged this · 4 years ago
 -
 awfucki reblogged this · 4 years ago
 -
 boxothings reblogged this · 5 years ago
 -
 futurewerewolf reblogged this · 5 years ago
 -
futurewerewolf liked this · 5 years ago
-
 danitaharris liked this · 6 years ago
 -
 smashwolfen reblogged this · 7 years ago
 -
smashwolfen liked this · 7 years ago
-
 tips-for-moving-out reblogged this · 7 years ago
 -
 abboudox liked this · 7 years ago
 -
 aflyonthewallflower liked this · 8 years ago
 -
 cthulhuchuu liked this · 8 years ago
 -
 elfrir-blog liked this · 8 years ago
 -
 wandererslost liked this · 9 years ago
 -
 indiecash liked this · 9 years ago
 -
penguin-on-ice reblogged this · 9 years ago
-
penguin-on-ice liked this · 9 years ago
-
 cybermuffin7777 reblogged this · 9 years ago
 -
 jerichopalms liked this · 9 years ago
 -
 esrescuer reblogged this · 9 years ago
 -
esrescuer liked this · 9 years ago
-
 cheyennechauvin liked this · 9 years ago
 -
 thedarkbritt reblogged this · 9 years ago
 -
thedarkbritt liked this · 9 years ago
-
 tsfreak879 liked this · 9 years ago
 -
 theskyelifee liked this · 9 years ago
 -
theskyelifee reblogged this · 9 years ago
-
 inatflammacardia reblogged this · 9 years ago
 -
inatflammacardia liked this · 9 years ago
-
 highltp reblogged this · 9 years ago
 -
highltp liked this · 9 years ago
-
 1punk-girl-in-doubt1-blog reblogged this · 9 years ago
 -
 0-katiekat-0 liked this · 9 years ago
 -
 susanplavnicka-blog liked this · 9 years ago
 -
 jxssica-vazquez reblogged this · 9 years ago
 -
 emilycookiegurl liked this · 9 years ago
 -
 okiedokie-m reblogged this · 9 years ago
