And Here They Are:
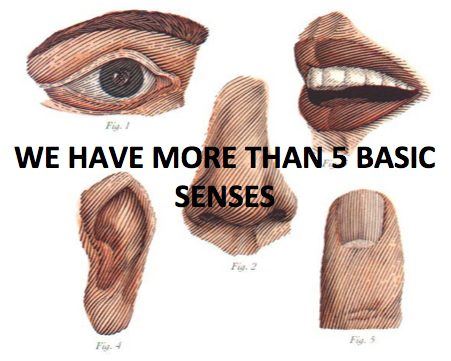
And here they are:
Thermoception: Ability to sense heat and cold. Thermoceptors in the brain are used for monitoring internal body temperature.
Proprioception: The sense of where your body parts are located relevant to each other.
Chronoception: Sense of the passing of time. Your body has an internal clock.
Equilibrioception: The sense that allows you to keep your balance and sense body movement in terms of acceleration and directional changes.
Magentoception: This is the ability to detect magnetic fields. Unlike most birds, humans do not have a strong magentoception, however, experiments have demonstrated that we do tend to have some sense of magnetic fields.
Tension Sensors: These are found in such places as your muscles and allow the brain the ability to monitor muscle tension.
Nociception: In a word, pain. This was once thought to simply be the result of overloading other senses, such as “touch”, but it has it’s own unique sensory system. There are three distinct types of pain receptors: cutaneous (skin), somatic (bones and joints), and visceral (body organs).
SOURCE
More Posts from Rgfellows and Others

via /r/woodworking


Happy April Fool’s Day!
We challenge you to plan out the most epic prank this April Fool’s. If you’re running low on ideas, check out the Prankster Skill for more projects like this head in a jar illusion. Using a photo editor, blend two images together to create a flat image of a head, laminate it, and submerge it in a jar. When the flattened image is inserted into the curved jar, the water distorts it - giving it the illusion of a decapitated head in a jar of preserving fluid.
Have fun!
Image Source: Instructables

via /r/woodworking

via /r/woodworking
Hello! Your embroidery is beautiful! Do you perhaps have tips or could recommend webpages/videos on how to embroider? I'm especially interested in how to do these mushrooms/flowers, which kind of stitches (?)/styles produce these artworks? Thank you for posting your gorgeous results!
Hello, and thank you!
I learned embroidery mostly from books, and have somehow watched hardly any embroidery videos. But I know there are lots and lots of websites and videos out there.
The main book I refer to now for embroidery is 18th Century Embroidery Techniques by Gail Marsh, but the Reader’s Digest Complete Guide to Needlework is my go-to book for anything that’s not in the 18th century one.The Readers Digest one is VERY thick and has a huge range of stuff from quilting to bobbin lace, and an excessively large number of embroidery stitches. It’s a very common book and if your local library doesn’t have it you can get a secondhand copy for pretty cheap. (Here’s one on etsy for $7.) And it’s just one of many similar needlework guidebooks, so it ought to be pretty easy to obtain one. The 18th century one still has a lot of stuff that typical needlework guides don’t though, like metal embroidery.
But you asked specifically about the mushrooms and flowers I’ve posted, and I’m happy to report that those require only a few basic stitches! Needlework guides are full of dozens of different stitches and variations, but most projects only require a small number of them.
Here’s a breakdown of what I’ve been using, with links to tutorials for each stitch.
Satin Stitch - This is one of the most common, especially for flowers and leaves and other such solid shapes. I prefer to use one strand for this, so I don’t have to un-twist anything.

You can also do Padded Satin Stitch, which is the same except you work it on top of one or more layers of satin stitch, or some other filling stitch. This makes it more 3 dimensional. For my waistcoat I’m not padding it though, I want my shapes to be nice and flat like a picture.
Long and short stitch - Very similar to satin stitch, but with longer and shorter bits so you can fill a larger area, or blend different colours together. This shows up a lot on shaded flowers and leaves. I used it to do a little bit of shading on my tree stump, and to fill in the wider part of my green mossy ground, because you don’t want to make your satin stitches excessively long.

This little sample I did a few years ago illustrates it more clearly.

Stem Stitch - Also fairly similar to satin stitch, but done thin and very slanted. It’s pretty easy to vary the thickness, like I’m doing for my maple twigs.

French Knots - These take a little practice because you need to get the tension right, but they’re not difficult. I’m using them for the dots on my mushrooms. The mushrooms themselves and their little patches of substrate are done in satin stitch, and the French knots added on top afterwards.

For the ferns I’m using stem stitch for the stalk, and to do the leaves I just do little straight lines coming off them. These are easy, you just bring the needle up at the tip of the leaf and back down again at the end that’s attached to the stalk, or the other way around, whichever. This probably has a name but I don’t know what it is.
(However, you can get a similar fern effect with Fly Stitch. Or, if you want your leaf placement to alternate, with Feather Stitch.)

The brown fanned out triangles on the border are done like my fern leaves too. Just in on one side and out on the other to make little straight stitches. The clusters of 3 green dots are French knots, and the solid green and brown lines on either side are satin stitch.

Split Stitch - That Beardsley inspired waistcoat I made all those years ago was almost entirely done in split stitch, with the exception of a few French knots here and there. Chain Stitch produces a very similar effect though.

Backstitch - This is a stitch I mostly use for garment construction, and it produces nice strong seams, but it’s also good for embroidering thin and fairly smooth outlines. It’s what I used for most of the embroidery on my monster waistcoat.

There are a lot more embroidery stitches, but that’s most of what I’ve been using!
Taken individually the stitches themselves are fairly easy, and when you use them all together in different shapes and colours you get something that can look much more complicated than it really is. I hope this is sufficient to get you started on whatever it is you’re looking to embroider.
Remember to always do samples before starting a Big Project!

via /r/woodworking
Panda Bear - Boys Latin by Encyclopedia Pictura


via /r/woodworking
By instagram.com/chefclubtv
-
 letsselenitequartz liked this · 3 months ago
 -
 jadedpawz liked this · 6 months ago
 -
 worldisahouseonfire reblogged this · 7 months ago
 -
worldisahouseonfire liked this · 7 months ago
-
 barot-roo liked this · 8 months ago
 -
 star-of-the-sea-ta liked this · 10 months ago
 -
 klownified liked this · 11 months ago
 -
 chery1bery1 reblogged this · 11 months ago
 -
 kalypso227 liked this · 1 year ago
 -
 neptunecookies liked this · 1 year ago
 -
 rosefier reblogged this · 1 year ago
 -
 spellsandspores reblogged this · 1 year ago
 -
 gastinos-gangstress reblogged this · 1 year ago
 -
 maggiewestphotography liked this · 1 year ago
 -
 eclipwzelight liked this · 1 year ago
 -
 frissons reblogged this · 1 year ago
 -
 blazeemm liked this · 1 year ago
 -
 catatankecilchai reblogged this · 1 year ago
 -
catatankecilchai liked this · 1 year ago
-
 julia-the-keeper liked this · 2 years ago
 -
 taboo-delusion liked this · 2 years ago
 -
 newerera liked this · 2 years ago
 -
 sayo-nora liked this · 2 years ago
 -
 mrow3meow3 liked this · 2 years ago
 -
 niraelyn liked this · 2 years ago
 -
 spastr0naut reblogged this · 2 years ago
 -
 yumidanshi reblogged this · 2 years ago
 -
 raytheoverlordofevil liked this · 2 years ago
 -
 pippinsquishums reblogged this · 2 years ago
 -
pippinsquishums liked this · 2 years ago
-
 its-pastelwaves reblogged this · 2 years ago
 -
 daphnectar liked this · 2 years ago
 -
 informationtrashheap reblogged this · 2 years ago
 -
 plurmf liked this · 2 years ago
 -
 mellokie reblogged this · 2 years ago
 -
mellokie liked this · 2 years ago
-
 suocce liked this · 2 years ago
 -
 redcarn4tion liked this · 2 years ago
