So You Might Be Saying: Lion Why A Guide On Drawing Black People? Well Young Blood It’s Because A Lot

So you might be saying: Lion why a guide on drawing black people? Well young blood it’s because a lot of people cant…seem…to draw…black people..Amazing I know.

Racist (caricatures) portrayals of black people have been around forever, and to this day people can’t seem to draw black people like they are human. If your artwork resembles any of the above even remotely your artwork is racist and offensive. If you try to excuse that as a stylistic choice you’re not only a terrible artist, but racist too!!! Congrats.

Whitewashing is also a problem. A lot of people refuse to draw black features on canonly black characters. While this example isn’t colored, lightening the skin-tone of a character is also considered whitewashing. So lets start with features!

Now all black people have different noses thats a no-brainer, but black noses tend to have flatter bridges, and wider nostrils. Please stay from triangular anime noses and small button noses. Your drawings should not depict black people with abnormally large noses. (Especially if you do not draw other characters this way)

If you feel like the way you draw lips on black characters is offensive or resembles a caricature,it probably does and you should change it. ABSOLUTELY AVOID PLACING LIPS AT THE BOTTOM OF THE FACE.

Hair is so diverse! Please get used to drawing braids, locs,kinks and coils! If you can learn to draw ringlets and long waves you can learn how to draw black hairstyles.

Add clips! Learn how to draw baby-hairs and never be afraid to add color Pinterest and Google are free my dudes! Also try using square brushes for blocking in coils.
OK THAT’S ALL YOU GUYS

More Posts from Basket-of-references and Others


being a self-taught artist with no formal training is having done art seriously since you were a young teenager and only finding out that you’re supposed to do warm up sketches every time you’re about to work on serious art when you’re fuckin twenty-five
i love love love the way you paint back lighting!! do you have any tips/ a step by step for the way you do it?
ended up making a whole painting just to break it down and explain my general process for subjects lit from behind so heres that + a timelapse!

main thing for drawing anything with a strong light source behind is to make the main subject Darker and more desaturated to convey that the light is behind them rather than to their sides (face cant be properly lit if the light is behind). Also making the Main highlight the brightest hue in the image helps to intensify it. I tend to use teeth/eyes as a good comparison point

some people have a tendency to make the sclera white out of habit but darkening that+ the rest of the whites helps the image read as Darker compared to the brighter highlight


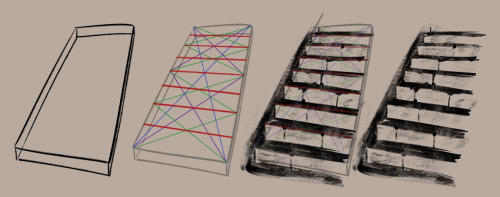
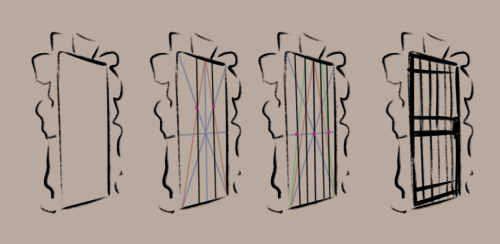
really helpful technique ^ once you know how to divide by halves and thirds it makes drawing evenly spaced things in perspective waaay easier:
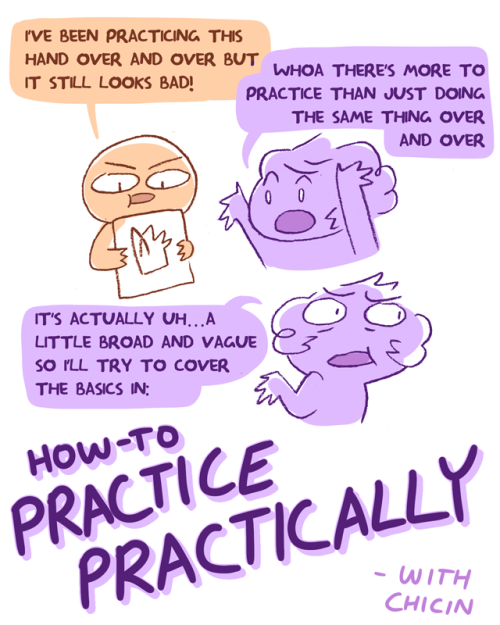


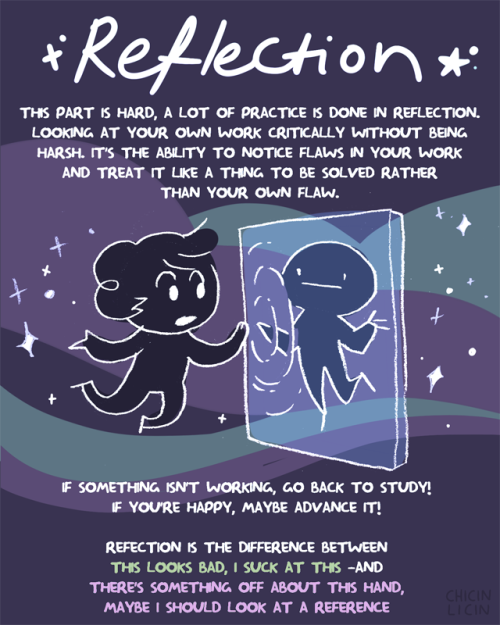
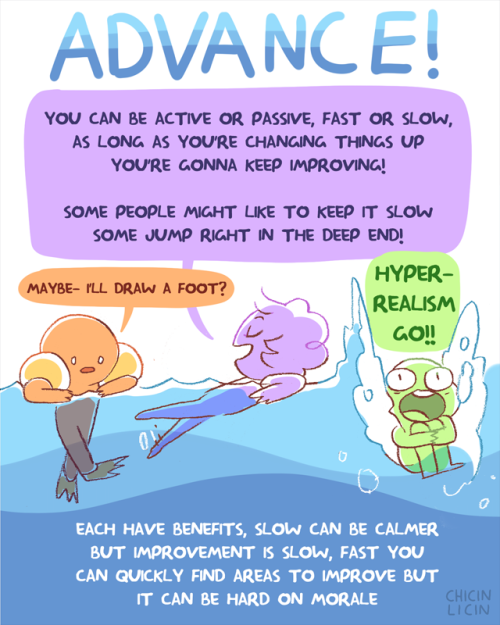
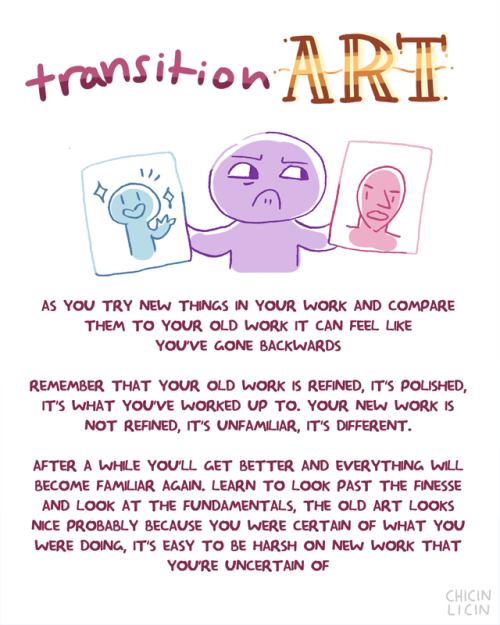
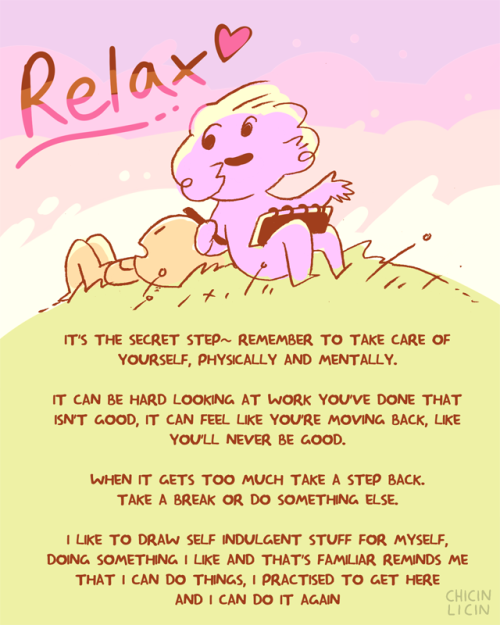
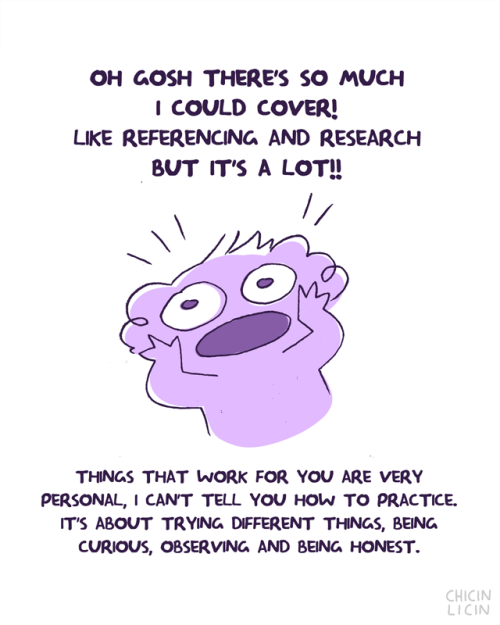
oh hey new guide thinggg~ some basics on how to practice! there’s SO much I could add to this, so it’s just the basics :O
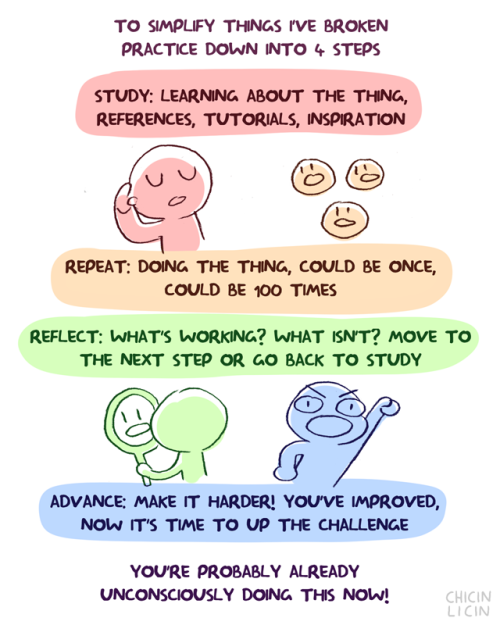
short (kind of): there’s more to practice than doing something repeatedly, it’s also learning new things, problem solving, and honest critique. Each of those is its own skill…also be nice to yourself!
Someone on discord asked how I was making pins with bottle caps so here goes nothing

you need
bottle caps (the ones made of metal obv)
pliers
safety pins
paper
glue
optional acrylic paint
optional paint varnish (the kind you would spray on top of an acrylic painting)

I'm only saying "optional" because sometimes you just like what's already printed on the bottle cap. I mean look at this puffin, it's so cute. But you should probably spray the print with varnish anyway if you don't want it to disappear too quickly (that cap on the left was in my pocket for like 3 months and the print has already disappeared around the edge)

pinch the edge of the cap with the pliers and turn it slightly toward the top side of the cap. Continue to do so around the entire cap but don't try to flatten it all in one go cause it's kinda hard. It should only take two minutes or so anyway

almost there

there, it's flat now. If you want to paint or write something on it, add a couple of layers of acrylic paint on it before you paint/write what you actually want on the pins

I wanted skeleton parts on mine because I saw someone with pins like that and idk where they bought them

I drew them with a Pitt pen on top of 4 layers of white acrylic

spray a coat of varnish on them but PLEASE do that outside, you do NOT want to breathe that stuff. Then wait a few hours for it to dry

on the back, add 1) glue 2) one safety pin 3) a thin paper across the pin - squish the paper against the wet glue. When it's dry, add another layer of glue on top. Just drown the back of the pin in crystal glue otherwise it's gonna break too easily. Just make sure the safety pin can still open and close easily
let it dry until the next day just to be sure. Tug on the safety pin a bit to make sure it's glued correctly

congrats you've made pins with bottle caps
If life is a never ending loop of dirty dishes and laundry then that means life is a never ending loop of home cooked meals and comfy clean clothes
Writing advice from my uni teachers:
If your dialog feels flat, rewrite the scene pretending the characters cannot at any cost say exactly what they mean. No one says “I’m mad” but they can say it in 100 other ways.
Wrote a chapter but you dislike it? Rewrite it again from memory. That way you’re only remembering the main parts and can fill in extra details. My teacher who was a playwright literally writes every single script twice because of this.
Don’t overuse metaphors, or they lose their potency. Limit yourself.
Before you write your novel, write a page of anything from your characters POV so you can get their voice right. Do this for every main character introduced.


-
 numberonepartyboy reblogged this · 2 months ago
 -
 kayayayayayayay liked this · 2 months ago
 -
 li-bialo reblogged this · 2 months ago
 -
li-bialo liked this · 2 months ago
-
 stunningtoredorsweetheart liked this · 2 months ago
 -
 queeraliensposts liked this · 2 months ago
 -
 febrieese liked this · 2 months ago
 -
 breadwheathead reblogged this · 2 months ago
 -
 breadheaddoodles liked this · 2 months ago
 -
 samejazzed reblogged this · 2 months ago
 -
samejazzed liked this · 2 months ago
-
 bigmommamd liked this · 2 months ago
 -
 tacoguy02 liked this · 2 months ago
 -
 cappybawa106 liked this · 2 months ago
 -
 xhais reblogged this · 2 months ago
 -
xhais liked this · 2 months ago
-
 ozzie-nrg reblogged this · 2 months ago
 -
 kokocactus reblogged this · 2 months ago
 -
kokocactus liked this · 2 months ago
-
 whatthedip liked this · 2 months ago
 -
 philipsrainyday liked this · 2 months ago
 -
 beautifulplay3r liked this · 2 months ago
 -
 toadsbitch liked this · 2 months ago
 -
 green-crow liked this · 2 months ago
 -
 autismvampyre reblogged this · 2 months ago
 -
autismvampyre liked this · 2 months ago
-
 feelsaddict reblogged this · 2 months ago
 -
 boxofuncookedmacaroni reblogged this · 2 months ago
 -
boxofuncookedmacaroni liked this · 2 months ago
-
 hell-where-i-belong liked this · 2 months ago
 -
 ferrisfebruary liked this · 2 months ago
 -
 crossstitchcodsworth liked this · 2 months ago
 -
 sublimedefendorartisan liked this · 2 months ago
 -
 ewiirr11-lxl liked this · 2 months ago
 -
 noh07 reblogged this · 2 months ago
 -
noh07 liked this · 2 months ago
-
 hel-10-s reblogged this · 2 months ago
 -
 urfavhoneybae liked this · 2 months ago
 -
 bloodblossomtree liked this · 2 months ago
 -
 seftali228 liked this · 2 months ago
 -
 dopezonkdreammug reblogged this · 2 months ago
 -
dopezonkdreammug liked this · 2 months ago
-
 thecourtfinchster liked this · 2 months ago
 -
 dr-alphys-lizard-mug liked this · 2 months ago
 -
 typosandtea reblogged this · 2 months ago
 -
 starite-wishes liked this · 2 months ago
 -
 oddlyspookz reblogged this · 2 months ago
 -
oddlyspookz liked this · 2 months ago
-
 pentacuore liked this · 2 months ago
 -
 24337556 liked this · 2 months ago
